Showing posts with label recipe. Show all posts

Tuesday, September 21, 2010

Pasta Primavera


I'm on vacation right now.  No classrooms or textbooks, no homework, and for eleven whole days, no desk job...  It's startling how much calmer and more relaxed I become when scholastic pressure is removed from the equation.  I'm practically a different person.  My boyfriend loves it (and tells me so quite often).

There are less than a week's worth of boxes left to X off on my calendar before the one that announces, "School Starts".   Monday is the day that I load up my backpack once again and begin yet another three month stint of lectures and labs and paper writing.  My emotions are a mixture of dismay and excitement.  It's back to the grind now, but the good news is that after this quarter I'll have all of the credits I need to graduate! Yay, excitement!  Oh, but I'll only be receiving my AA degree. That bachelor's is still a considerable distance away.  Sigh.... dismay...

Sunday, July 18, 2010

When Summer Gives You Veggies


This is the time of year when I tend to overindulge at the farmer's market. When the vendor's tables are overflowing with summer veggies.  Not to mention the greens that my garden is putting out.  Sometimes my fridge is bulging with produce, and I've found one of the easiest ways to plow through it all is to chop and fry and season those vegetables into an Asian-inspired stir fry.


This week past I was in this exact situation (I refuse to call an overload of veggies a predicament), so I broke out the wok and the cutting board and got busy making dinner.  One thing I love about stir fry is that a recipe isn't really necessary.  A little salt, a little cayenne, a splash of tamari... it's an experiment on the stove top that allows for lots of tasting and tweaking.


This stir fry also came with tiny pink shrimp and a spicy miso peanut sauce.  The whole shebang was served over top of some super skinny rice noodles, although it could have just as easily (and tastily!) been served over a pile of steamed rice.

Like I mentioned before, there wasn't a precise recipe involved in the making of this dish, but here's an approximation if you'd like to give it a try.


Summer Stir Fry with Peanut Sauce
serves 3-4

For the peanut sauce:
3/4 C. peanut butter
1/2 C. water
3 T. sesame oil
1/2 tsp. cayenne pepper
1 generous tsp. white miso paste
salt to taste

For best results, do not make the sauce too long before the stirfry.  

In a small sauce pan over medium heat, combine first 5 ingredients  and stir well.  The peanut butter will begin to melt as it heats up.  Continue to stir periodically until mixture is smooth.  Taste and season with salt if necessary.

If the sauce is too thin, add more peanut butter by the tablespoon full until desired thickness is reached.  If too thick, add more water by the tablespoon full.  If the sauce sits on the heat for too long, it may separate into oily globs.  Just add a little bit of water, put it back on the heat and stir until smooth. 

For the stir fry:
2 T. olive oil
1 medium onion, cut into 1/2" wedges
2 carrots, sliced 1/4" thick
1 small head broccoli, cut into 1" pieces
1 large handful snow peas, ends trimmed, cut in half
1 Anaheim pepper, seeded, cut into 1/2" pieces
1 medium zucchini, cut into 1/2" half circles
6 oz. small, cooked shrimp
2 or 3 cloves garlic, minced
salt to taste
1/2 - 1 tsp. cayenne, to taste
a splash of tamari
1/2 package thin rice noodles
sesame seeds (optional), for garnish
several fresh basil leaves (optional), for garnish

Cook noodles according to package directions.

Heat olive oil in a large wok over medium-high heat.  Add the onion, toss in oil and cook several minutes until beginning to turn translucent.

Add the remaining vegetables, garlic, cayenne and tamari and season with salt.  Stir fry 5-10 minutes or until veggies are the desired tenderness.  Add the cooked shrimp, toss and cook until shrimp are heated through, just a few minutes.  Taste and season again with salt and/or cayenne if desired.

Divide noodles onto plates, top with veggies and peanut sauce and serve garnished with sesame seeds and basil leaves.  Bon Appetit!


Tuesday, June 22, 2010

Strawberry Crisp


Since I've already waxed poetic on the whole strawberry picking adventure and the tastiness of the fresh, plump, juicy fruits of my labor, this post is going to be dedicated to my new view of the world. What view is that, you might be asking? Well, I've recently been forced to see things, specifically my dinner plate, through the eyes of one who is gluten intolerant. I haven't discussed it here, but I gave up gluten a couple of months ago as an experiment after dealing with a surge of unexplained headaches and severe exhaustion. Well, the headaches ceased almost instantly, my skin cleared up significantly, and my energy levels have jumped up a notch or two. So now, much to my bread-loving dismay, gluten and I can no longer be friends.

We had a good run, gluten and I. We grew up together in the kitchen and meals of my family, although I am definitely guilty of under-appreciating this old chum of mine. In my adult life we've spent many an hour working together in the kitchen to conceive of delectable baked goods like this one, and this one. It's true what they say - it's so easy to take your gluten for granted until you just can't digest it anymore (that is something they say, isn't it?).

So now I'm beginning to dip my big toe into the waters of gluten-free baking. It's intimidating, what with those long lists of unfamiliar ingredients. Tapioca starch? Xanthan gum? Those bear a striking resemblance to the sorts of ingredients that I've been avoiding for years. If I don't know what it is or if I can't pronounce it then it shouldn't be going into my body, right? I guess I need to tweak that ideal a bit. Xanthan gum, here I come.

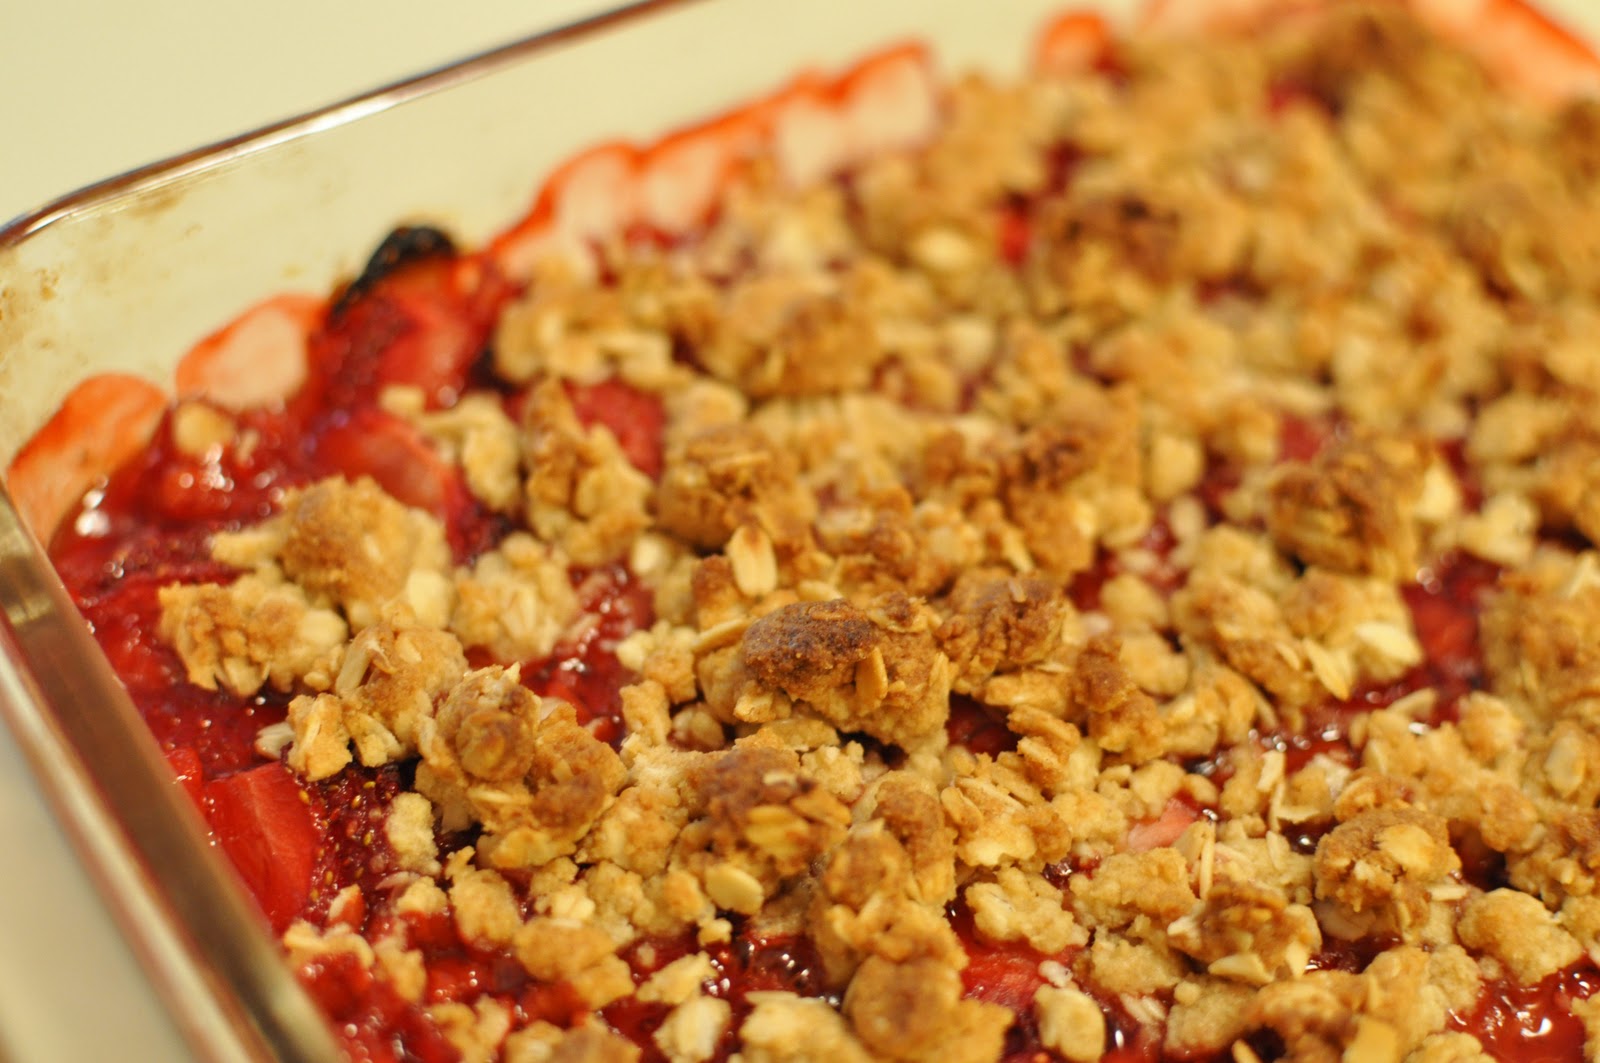
My first official gluten-free baking attempt happened two nights ago. I'm sure you're already aware of the form it took from the inconspicuous title of this post and the giant, crumb-covered dessert pictured above. I am proud to report that the recipe was a resounding success, even by the standards of two gluten-tolerant guys, one of whom doesn't even eat desserts. A little pat on the back for moi.

I started out with a crisp because they're fairly easy to make. There's no rising that needs to occur as with bread or cake, and they are the perfect place to put berries, of any flavor.

So here you go. One delicious, gluten-free strawberry crisp recipe. Enjoy!


Gluten-Free Strawberry Crisp
makes 6 servings

1 C. gluten-free rolled oats (not quick oats)
1 C. all-purpose gluten-free flour blend (I used Bob's Red Mill)
1 tsp. xanthan gum
3/4 C. brown sugar
7 T. butter, diced
1/4 C. sugar
3 C. strawberries, sliced

Preheat your oven to 350 F.

Mix together the first four ingredients in a medium bowl. Cut in the butter (I use my fingers to rub it in - it's the most effective way I've found) until mixture is crumbly.

In another bowl, mix the sliced berries and sugar together.

Grease an 8-inch square baking dish, and spread half of oat/four mixture on bottom. Lightly press the mixture down to form a bottom crust for the crisp. Don't worry if there are holes or cracks, it doesn't matter if it's not perfect.

Cover the bottom crust with the berries and spread evenly.

Crumble the remaining oat/flour mixture over the berries. Pop it into the oven and bake 35-40 minutes, or until the top is golden brown and the berries bubbly.

Serve warm or cold. Vanilla ice cream is optional but highly recommended.

Tuesday, June 8, 2010

Pesto Toasts

 
There was basil for sale at last week's farmers market. A sure sign of summer, right? The rain and cold around here lately says otherwise, but I'm happy to take my summer in doses of fragrant, green, leafy herbs if that's all I can get for now.

I didn't use up the bunch of basil that I bought right away, and a few days later noticed a few brown edges amongst the bundle of green in my fridge. There was a moment of slight panic, like when I think I've lost my wallet (thumping heart, wave of heat), at the thought of all that flavor potentially wasted, but then I remembered. Pesto.

Whoever (whomever? I'm never sure) happened upon this magnificent blend of herbs and oil and garlic and cheese should be given a day. Pesto Appreciation Day, or P.A.D. Anyway, you get my drift.  I'm all about versatility in foods, and this one is definitely a winner on that front. Pizza, pasta, meats, fish, eggs, roasted veggies, sandwiches... pesto makes it all taste good. Really good.

The night I made my pesto, I decided to spread it onto toast as a simple addition to the veggie stew I was serving for dinner. Did I mention that pesto is good? Well, it didn't fail to please when smeared on toasty bread with some Parmesan sprinkles on top.


Here's the run down.

Pesto Toasts
serves 2+

2 C. basil, firmly packed
1/2 C. grated Parmesan cheese, plus extra for garnish
2/3 C. olive oil
1 large clove garlic (or more if ya like)
2 or more slices bread, toasted & cut into triangles

For the pesto:
Add basil, Parmesan, olive oil and garlic to a food processor or blender and flip that baby on.  Process until smooth, stopping to scrape down the sides several times as necessary.

Let the pesto rest for at least 10 minutes for the flavors to meld and work their magic.

To assemble the toasts:
Spread a couple of tablespoons of pesto on each toast triangle, sprinkle with some Parmesan and serve.
Easy peasy.

Store any leftover pesto in an airtight container in the fridge. Another option is to freeze it. If you actually have any leftover, that is.

*** Most recipes call for pine nuts in pesto. If you want to add them to this recipe, please feel free to give it a shot. I might have if I'd had some around, but I found this recipe to be slammin' without.

Friday, June 4, 2010

Frittata with Asparagus, Spinach & Morel Mushrooms; Cajun Homefries on the Side


I just moved into a new apartment with my sweetheart. It's a fantastic place in northeast Seattle with huge south and west-facing windows that our plants absolutely adore, a covered balcony that will soon support this year's herb garden, and a washer and dryer in the unit. Movin' on up, people. The very best, best part about our deluxe apartment in the sky (yup, top floor) is the kitchen. It's huge. OK, not 600 square feet, island in the center, breakfast nook to the side huge, but compared to the other apartment kitchens I've lived with, this one is monstrous. I could do a cartwheel in it if I were agile enough ('if' being an important, key word here).

I've wasted no time breaking in the new space. Even with finals looming in the not too distant future, I've been in the kitchen whipping up breakfasts and dinners like it's no body's business. My suppressed creativity (from all those years being squashed into tiny kitchens, no doubt) has finally burst out of me, and the result has been one delicious meal after another (if I do say so myself :). Dan and I have been oohing and ahhing for the last week and a half over the flavors and aromas that have come together in our new home. It's been a great way to settle in as we work our way through the pile of boxes stranded in the middle of the living room floor. We're almost ready for dinner guests.


One night last week I decided that we just don't eat enough brunch. The idea for a frittata and home fries soon followed that realization. Of course we had asparagus on hand, so I knew that would go in. I also had onions and spinach from the farmers market, and I happened to have an ounce of dried morels courtesy of Marx Foods left over from my winnings through the Foodie Blogroll. This meal plan was on the up and up. Here's what I concocted that night.


Frittata with Asparagus, Spinach & Morel Mushrooms with Cajun Homefries
serves 2-4

2 medium potatoes, cut into 1/2"-3/4" cubes
2 T. olive oil
1 1/2 tsp. cajun seasoning (we use Tony Chachery's)
4 large eggs, lightly beaten
1/2 tsp. salt
freshly ground black pepper
1/2 T. butter
1/2 C. (heaping) onion, diced
1 large clove garlic, minced
1/2 lb. asparagus, cut into 1/2" pieces
1 oz. dried morels, rehydrated (broth saved for another use), coarsely chopped
1 handful baby spinach leaves

For the potatoes:

Preheat the oven to 400 F.  In a medium bowl, toss potato chunks with olive oil and cajun seasoning.

Spread the potatoes in a single layer on a baking sheet, and place in the oven.

Bake for 12 minutes, remove from oven and toss on the pan. Return to the oven and bake an additional 10 minutes until potatoes are tender and golden brown.


For the frittata:

Melt the butter over medium heat in an 8" oven-safe skillet (I love my cast iron!). Add onions and saute for several minutes until beginning to turn translucent.

Add the garlic and asparagus pieces, season lightly with salt and cover the pan with a lid, leaving a space for steam to escape. Steam/saute in this manner for about 3 minutes, stirring occasionally until the asparagus is slightly tender but still crisp.


Add the morels and spinach, replace the lid and continue to saute for several more minutes, stirring occasionally, until spinach is wilted (don't overcook your veggies at this point! They should still be bright green and crisp).


Whisk salt and a few grinds of black pepper into the beaten eggs and pour over veggies in skillet. Turn heat to low, cover skillet and let cook 6-8 minutes, until set around the edges but still wet on the top. Meanwhile, preheat your oven's broiler.


Place your frittata (skillet and all) under the broiler for about 5 minutes until the top is set and golden brown in color. Keep an eye out so it doesn't burn! Remove from oven, slice into pieces and serve hot with a side of spicy homefries.

* This recipe can easily be doubled for guests or your hungry family. Use 8 or 9 eggs, and up the pan size to 10" or even 12". Also, frittatas are really versatile. Try using different veggies or mushrooms, adding bacon or incorporating some of your favorite shredded cheese. Get creative! 

Tuesday, May 25, 2010

There's Just Something About a Duck...


I grew up eating a lot of eggs. Fried, scrambled, hard-boiled, whisked into casseroles and cakes. Our fridge was never without at least a dozen of those white orbs, lined up two by two in their paper carton. Although a fare share of our breakfasts did include them (over-medium, please!), it wasn't just in the morning that eggs made appearances on our plates back then. We ate egg salad sandwiches at lunch time, and my mom's 'Creamed Eggs on Toast' was a family favorite at the dinner table (think gravy with sliced, boiled eggs served over toasted bread). I loved eggs then, and I am absolutely enamored with them now.

Of course, as a child, we only ate chicken eggs. They were perfectly white, grade A large, uniform in size and shape, purchased from Kroger at least once a week. If you had tried to feed me a brown egg when I was a child, or even worse, one from some animal other than a chicken, there would have been hell to pay. I knew what eggs were supposed to look like and from which farm animals they were supposed to come.

But then I grew up. And I realized that those eggs I'd been so adamant about eating weren't really all that good. I started eating brown eggs which were pretty tasty. And then I started buying eggs from a farmer which were all different colors and sizes. Those were really tasty. And then one day, I ate a duck egg. It was magical.


Never before had I experienced such richness, such creaminess as that which spewed forth from that shell. I was immediately in love. I ate fried egg sandwiches like they were the only edible thing left on Earth. It was euphoric to have the gooey, yellow yolk dripping from my chin. Have you ever had a hard-boiled duck egg? You must. They are luscious.

Besides the unbeatable flavor and texture, duck eggs have other benefits, as well. One is that they contain more albumen, the protein in the white, which gives them more structure when they're cooked. This makes them powerhouses for leavening your baked goods. Those cakes will be fluffier than ever!


On the nutrition front, duck eggs also get high marks. They are an excellent source of protein, iron, potassium and all nine essential amino acids. For a look at the nutrition content of duck vs. chicken eggs, check out the table on this site. Since the yolks are larger, duck eggs do have more saturated fat than their chicken counterparts, but the difference is slight (only about 3g). With all things considered, the extra fat is a small price to pay.

I buy my duck eggs locally from Sky Valley Family Farm out of Startup, WA at the University District Farmer's Market. I have also seen them for sale at Whole Foods and Seattle's local co-ops, PCC and Madison Market. Check your local health food store and farmers market to see if duck eggs are available in your community. You'll love them, I promise.

Below is a recipe for egg salad that I recently tried out. It was adapted from this one at the Food Network and tasted pretty good. Not nearly as good as my mom's, though.


Egg Salad
makes 4-6 servings

6 duck eggs, hard-boiled, cooled & peeled
1/4 C. mayo
1 T. chopped, fresh dill
1 T. whole grain mustard
2 tsp. fresh squeezed lemon juice
1/2 tsp. sea salt
2 T. chopped, fresh chives (I used garlic chives)


Place the eggs in a medium-sized bowl and coarsely chop with a fork.  Add the remaining ingredients and stir while continuing to cut apart the eggs. I like to leave mine a little on the chunky side. 


Smear onto bread for traditional sandwiches, dollop onto crackers as dainty appetizers, or serve alongside raw veggies as a killer dip. Enjoy!


Wednesday, May 5, 2010

Pasta for Two


One of the best things about spring is the gradual reappearance of foods at the farmer's market that haven't been around since last season. It's like meeting up with old friends who haven't been in your regular circle for a while. Eyes lit up, grin etched on face... I'd run over and give those long-time-no-see-veggies a hug if I didn't care at all that people would consider me crazy. I'm not the only person who is so moved by the first asparagus crop or the return of the cultivated mushroom guy, am I? Even if I am, I wouldn't trade that elation. It's a pleasure to appreciate the bounty of this time of year.

This past weekend I did, in fact, run into my old chums Asparagus and Oyster Mushrooms. (I couldn't tell if they were happy to see me?) My boyfriend and I decided that they simply must come home with us for dinner. Actually, some of the mushrooms didn't make it past breakfast. They were a fantastic addition to our veggie scramble, along with fresh spinach leaves and yellow onion procured that same morning.

My mind tends to churn over menu ideas fairly vigorously on Saturday mornings. I don't have the mental burden of work or school at the forefront, and the market, which has risen to dogmatic ritual for Dan and I, is the perfect place to become lost in daydreams of delicious potential. Saturdays are the days when I pull out dusty cookbooks and leaf through stacks of recipe clippings. I love this time.

I decided that our asparagus and mushrooms would be perfect for a pasta dinner. Pasta for the two of us. This is what happened in the kitchen that weekend...

Pasta with Chunky Tomato Sauce, Asparagus & Oyster Mushrooms
serves 2-3

8 oz. spiral pasta
2 T. olive oil, separated
1 15oz. can diced tomatoes, no salt added
1/2 lb. asparagus spears, cut into 1- 1 1/2" pieces
1/2 lb. mushrooms, slice (I used oyster)
1/2 medium onion, diced
1 lg. clove garlic, minced
1/2 tsp. dried thyme
salt to taste
1/4 - 1/2 tsp. cayenne or crushed red chili pepper
2 hand fulls raw spinach, torn into pieces

Put water for the pasta on to boil, cook pasta according to package directions. Drain and set aside.

While the pasta is cooking, puree 2/3 of the diced tomatoes with their juices in a blender or food processor, and set aside.

Add 1 T. of olive oil to a large skillet (preferably with sides) and heat over medium. Add the onion, and saute for several minutes until it begins to turn translucent. Add the mushrooms and asparagus.


Season the veggies with salt, add the cayenne and thyme and stir to combine. Cover the pan, leaving a slight opening for some steam to escape, and steam veggies for about 5 minutes, stirring a few times.

Add the tomato puree and the remaining diced tomato chunks to the skillet and stir it up. Add the garlic, bring the sauce to a boil over medium-high heat and then reduce to medium-low and simmer for about 10 minutes, stirring occasionally. Taste and season sauce with more salt and/or cayenne if desired, and test the asparagus for tenderness (it should still have a slight crunch). Turn off the heat or continue simmering if necessary.

Add pasta back into the saucepan used for cooking, along with the remaining tablespoon of olive oil, and heat for several minutes to warm the pasta.

Arrange torn spinach leaves onto serving plates, divide pasta onto spinach, and top with the tomato/veggie sauce. Serve steaming hot plates of tasty food to yourself and your sweetie (or whoever you want to share with!).

Sunday, May 2, 2010

Easy Hummus


Like many busy people out there, I take time on the weekend to prepare food that will get me through the long days and hectic schedules that are my reality Monday through Friday. It's something that I started doing when I went back to school full time so that I'd have something decent to consume for my treks across town to campus where classes and work have kept me for up to 10 hours at a stretch.  Ten hours.  That's at least two meal times and a snack. My budget won't let me eat out more than once a week, and my food sensitivities and distaste for deep-fried-everything keep me away from the school's cafeteria (it is sickening what they serve to students). In order to avoid this classroom-coronary-waiting-to-happen 'food', I end up toting along a second bag with containers full of home-cooked meals, fruit and DIY trail mix. It's a lot to carry, honestly, but well worth the effort in the end.

Luckily, this quarter my time on campus is below the 8 hour mark, so lunch and a snack are all I need to haul with me. On Sundays I usually whip up a pot or a skillet full of something. Sometimes a rice dish, sometimes a salad, or, as of late, a big batch of hummus.

I love this creamy spread for it's simplicity and versatility. There are so many ways to go with this one: roasted veggies, cilantro, chilis, olives, hummous, hummus... which ever way you do it (or spell it), it's one amazing dish. I've been working on perfecting my recipe for a fairly traditional-style hummus. I think today's batch was my best yet. Try it for yourself.


Classic Hummus

2 C. cooked garbanzos (I cook my own, so the measurement is NOT equal to a 15oz. can)
3 T. olive oil
3 T. tahini
juice of 1 lemon
2 cloves garlic, roughly chopped
1 1/2 tsp. salt
1 tsp. cumin
10 T. water
sprinkle of paprika for garnish (optional)

Add the first 7 ingredients to your food processor, turn that puppy on and process until the mixture starts to form a ball, scraping down the sides of the bowl a few times. Turn off the machine, add 5 T. of water and then process some more.

At this point the mixture will start to thin out some.  With the processor running, add the remaining water, 1 T. at a time.  Stop and scrape the sides down a few more times as you're adding the water.  Taste your creation and season further if you like.  If the hummus is still too thick for your liking, add a tablespoon or 2 more water and continue to process.

Scrape it out into a serving bowl and garnish with paprika, if using.  Serve with fresh veggies, or pita, or slather onto bread as a tasty sandwich spread.  Share it with hungry friends or horde it all to yourself (that's what I do!).  I'm having mine with tortilla chips this time around. And  probably a finger dip or two.

Saturday, April 24, 2010

Berry Stash

A couple of weeks ago, when Seattle's landscape was under a constant barrage of spring-time rainfall, I got a craving for berries. Plump, juicy jewels of summer... The idea seemed so far fetched. Yeah, I know that it's possible to hit up the grocery store for berries all year long, but it's just not the same. Those supermarket fruits are like impostors; gritty, tasteless lumps donning the costume of freshness and flavor so naturally employed by the authentic berries of summer. I wanted that purity. I wanted to eat berries that would shout out their prefixes as they hit my hungry palate... Ras! Blue! Straw!... amongst my own squeals of delight.

I did a very smart thing last year. I froze berries. Somehow I knew that winter would stretch on and on and I would yearn for the sweetness. Luckily a couple of weeks ago I still had a pint or two stashed way in the back of my freezer. After confirming that both strawberries and blueberries did in fact exist in the depths of that frosty compartment, I took just a moment to consider my plan. It didn't take long to figure out that waffles with berry sauce was the answer to all of my longing.


Berry Sauce

1/2 pint each blueberries & strawberries (fresh or frozen)
2 T. honey

If using frozen berries, thaw. Cut larger strawberries in half.

Combine the berries and honey in a small saucepan over medium heat. Stir and allow the mixture to come to a simmer. As the berries release their juices, smash them with a fork or other utensil to make a chunky liquid. Taste and add more honey if you see fit. I don't like my sauce to be too sweet, though.

Continue to cook the berries for another 5-10 minutes, turn off the heat, and you're ready to bliss out!


I used a mix that I really enjoy to make these waffles. It's called The Cravings Place: All Purpose Pancake and Waffle Mix. This mix makes fantastic waffles (the pancakes I've made with it were only so-so).


Spoon the warm berry sauce over the crispy waffles and transport yourself to late July. So amazing. If you're fortunate enough to have leftovers, this sauce is also magnificent over a bowl of vanilla ice cream. Indulge... Enjoy...

Sunday, April 4, 2010

Camera Shopping; and an update on iced oatmeal cookies

I've decided to invest in a new camera. One of those fancy DSLRs. I've been reading reviews and specs 'til my eyes want to bleed and finally ventured out to Seattle's fantastic Glazer's Camera to test drive a few different models and, hopefully, come to a decision. I must say that it's a little scary for me to be making this purchase. I've never been one to spend a lot of money on gadgetry, and I have a certain distrust for computerized machines (it took me ages to get comfortable with this here laptop).

Up to this point, this blog has been adorned with photos taken with either a Canon digital point-and-shoot or a Nikon FE2 35mm slr. The latter of these I absolutely adore. It is completely manual, takes amazing photographs and is astounding in its simplicity. I use a 50mm fixed lens on that puppy with results such as these... and these. I love it.

So why the change? Well, for starters, the cost of film and development is forever increasing, and my meager student income does not allow for a lot of extras. This means that I take very few shots in order to conserve exposures. This conservation leads to extended periods between trips to the developers, which in turn leads to huge delays between cooking time and posting time. Unless I use the little Canon. It takes good pictures also, but then I miss playing around with the depth of field. I'm a sucker for fuzzy backgrounds, what can I say?

I long for the convenience of the digital world and the luxury of the slr. So I'm taking the plunge (and the hit to my bank account) and nabbing myself a new camera. I'm so excited!

So what prompted this post were the iced oatmeal cookies that I made and posted about a little while back. It felt kind of wrong to post the recipe without a mouth-watering photo alongside, so I waited. Well, I still haven't used up the 24 exposures on that particular roll of film. So here I am with a great recipe and no visual imagery. So sad.

What I've decided to do is post the recipe anyway. Sooner or later I'll have those pics, and I'll post them up (assuming they turned out well) at that point. Believe me when I say that pleasure will spew forth when these cookies are consumed. I had plenty of helpers to eat mine up, and nary a negative word was heard. Enjoy!


Iced Oatmeal Cookies
makes 20-24 cookies
vegan friendly

Cookies:
2 T. flaxseed meal
1 C. oat flour*
1 tsp. baking powder
1/2 tsp. baking soda
1/2 tsp. salt
1/2 tsp. ground cinnamon
2 T. vegan margarine (or butter)
1/2 C. brown sugar
1/4 C. sugar
1/4 C. applesauce
1 tsp. vanilla extract
1 1/2 C. old-fashioned oats
1/2 C. raisins

Icing:
1/4 C. confectioners' sugar
2-3 T. lemon juice

For the cookies: Stir together flaxseed meal and 3 T. water in a small bowl. Set aside.

In a medium bowl, whisk together the oat flour, baking powder, baking soda and salt. Set aside.

In a large bowl, beat margarine, brown sugar and sugar with electric mixer until light and fluffy. Add flaxseed mixture, applesauce and vanilla, and beat until smooth.

Stir dry ingredients into wet with a wooden spoon. Add oats and raisins, stirring to combine.

Cover and chill the dough for 2 hours or overnight. (this step can be omitted - cookies will be softer)

Preheat oven to 350 F and grease cookie sheets. Roll dough into balls about the size of golf balls (if you skipped the refrigeration step, go ahead and drop spoonfuls of dough onto the pans and proceed to bake!) and place on cookie sheet. Flatten each cookie to 1/4" thickness with a drinking glass dipped in water.

Bake cookies 10-14 minutes until they look dry on top and are just beginning to brown.

For the icing: Whisk together the confectioners' sugar and lemon juice in small bowl until smooth. Icing should be thick but spreadable. Dip cookies into the icing (or use a pastry brush to apply icing to each cookie) and allow the cookies to cool and the icing to harden.

Eat them up!

*a note regarding oat flour. You can make it yourself by throwing some rolled oats into your food processor and grinding them up into a powder. It can take a few minutes, so be patient and keep stopping the processor and stirring them up. If it doesn't get as fine as flour normally is, don't sweat it. You won't even notice the slightly larger flakes in this recipe. Use about 1 1/4 C. of oats to get 1 C. of flour.

Thursday, February 4, 2010

Project Brussels Sprouts

Blogging has turned into this thing I used to do. So has cooking, for that matter. Back before the fog of school blanketed my life, and time became increasingly elusive. It's a sad sad situation, especially since I have two, count 'em, two classes this quarter that are directly related to food. I have a plethora of topics and information to share on both the nutrition and the sustainable urban agriculture fronts. Yes, I am cramming all sorts of food wisdom into my eager noggin, but lamentably, I can only spend so much of my life in front of a computer. The weather is beautiful in Cascadia at the moment, you'll just have to trust me on that one.

I do have a couple of recipes to share. In my nutrition class we were assigned what our teacher refers to as the "Foreign Vegetable Project". For this project we were to visit a local farmers market (sweet!), choose a vegetable that we have never (or rarely) eaten, prepare a dish and present our experience to the class, including information that we researched about the farm we purchased from.


First off, I have to give big props to my professor! What an incredible way to - 1. promote seasonal foods - 2. learn about local farmers - and 3. get tasty recipes from classmates. I was actually excited to complete this project, and I'll tell you... that is a rarity.

So for lack of a vegetable at the market that I had never had, I chose one that I absolutely adore. Brussels sprouts are like the strawberries of winter, as far as I'm concerned. I look forward to their green, little cabbageness the way I anticipate the arrival of heirloom tomatoes in summer. And since I love the taste and texture so much, I decided to prepare my sprouts as a side dish for the project with a hearty lentil stew for a main course.


Roasted Brussels Sprouts
(vegan)
serves 2

20-25 Brussels Sprouts (approximately)
1 T. olive oil
1/4 tsp. salt
1/4 C. finely grated cheese (like Parmesan or manchego) optional
Preheat the oven to 375 F.
Wash the sprouts thoroughly, trim off the rough stems and cut large sprouts in half through the stem.
Place the sprouts in a baking dish and drizzle oil over them. Sprinkle with salt, and toss to coat. Arrange the sprouts in a single layer in the dish.
Place the dish on the center rack of the oven and bake for 15-17 minutes, stirring once. The sprouts should be tender but not mushy. Sprinkle with finely grated cheese (optional) and serve immediately.
Lentil Vegetable Stew
(vegan)
serves 2

1/3 C. dry lentils (any variety will work)
1 T. olive oil
1 C. diced onion
1 T. flour
¼ tsp. cayenne pepper
½ tsp. cumin
2 C. vegetable broth
1 C. potato, ½” dice
¾ C. carrot, ½” dice (about one large carrot)
1 clove garlic, minced
1 C. packed kale, chopped into 1” pieces

Put the lentils into a large saucepan, cover with 1-2” of water and bring to a boil over high heat. Reduce heat slightly and boil until the lentils are tender, about 15-20 minutes. Strain the lentils, pour into a bowl and set aside.

In the same pan, heat the olive oil over medium and add the onions. Saute until they begin to turn translucent, about 2-3 minutes. Add the flour, cayenne and cumin and cook another minute.

Pour in the vegetable broth, turn the heat to high and bring to a boil. Add the potatoes, turn heat to medium-low and simmer 5-8 minutes, until potatoes are tender, stirring occasionally.
Add the carrot and garlic and continue to simmer another 5 minutes, stirring a few more times.
Stir in the kale and cook another 3-5 minutes. Carrots should be tender but not soggy, and kale should be bright green and slightly crisp.
Turn off the heat, ladle into bowls and serve piping hot.

Wednesday, December 30, 2009

Chili Cornbread Casserole


There are few things better during the cold months than sitting down to a steaming bowl of soup, stew or chowder. One of my favorite hearty soups to make is the American classic, chili. Rich and tomatoey with lots of dark kidney beans and hot pepper, this soup rocks my world. An almost necessary companion is, of course, cornbread. The two go together like Harold and Maude... or Burt and Ernie, even. My love for this combo is so great, that I decided to meld them together into one dish. One dish to rule them all (sorry, I'm full of lame references today).

Have a taste for yourself.

Chili-Cornbread Casserole
(vegan-friendly)
serves 6-8

For the chili:
1 T. cooking oil
1 medium onion, diced
1 T. chili powder
1/2 - 1 tsp. cayenne (or more or less, depending on your heat tolerance)
2 C. diced tomatoes (either from a can or fresh)
1 small can tomato paste
2 15 oz. cans kidney beans (or whatever kind you like)
1/2 lb. mushrooms, sliced (again, whatever kind suit you)
2 cloves garlic, minced
salt to taste

In a large pot, heat the oil over medium and add the onion. Stir and cook for 2 minutes until it begins to turn translucent. Add the chili powder, cayenne and about 1/2 tsp. of salt to the onions, and cook for another minute, stirring to coat the onions.

Pour the tomatoes into the pot and stir well. Add the tomato paste and stir to combine. Simmer the soup for several minutes, and then add the beans, mushrooms and garlic. Continue to simmer over medium-low heat 5-10 minutes, stirring occasionally, until the mushrooms are tender. Season with salt and more cayenne if you prefer more spice.

Turn the heat to low and proceed to the cornbread recipe.

For the cornbread:
1 C. flour
1 C. cornmeal
1/4 C. agave nectar
4 tsp. baking powder
3/4 tsp. sea salt
1 C. soy or rice milk
1/4 C. olive oil
2 T. flax seed meal
6 T. water


Bring the water to a boil in a very small saucepan, and add the flax meal. Reduce the heat to medium-low, and stir for 3-4 minutes, until the mixture is really gooey. Take off of the heat.

Meanwhile, mix the flour, cornmeal, baking powder and salt in a large mixing bowl until well combined. To this, add the agave, oil, milk and flax mixture, and stir until just combined. Don't over-mix.

To assemble the casserole:
Pour your piping-hot chili into a 9x13" baking dish, and stir it up a bit to get a decent tomato-to-bean/veggie ratio. Then, spoon the cornbread batter over the chili, being sure to cover the entire surface. You don't need to spread the batter. It'll stretch out and fill in the cracks between spoonfuls once it's in the oven.

Now place the baking dish on the center rack of your oven, and bake for 20-25 minutes, or until a toothpick inserted in the cornbread comes out clean. Serve by scooping out of the pan with a large spoon or spatula.


This is a great dish to make if you're in the market for leftovers. Hope you enjoy!

Monday, December 28, 2009

Miso Hungry


I think I'm obsessed with soup. That steamy, warm, brothy goodness is taking over my diet in one form or another, making its way into my meals with increasing frequency. I crave thick stews, heavy with beans and vegetables and yearn for noodles drowning in herbed stocks (think broth, not Wall Street). This winter has been ripe with experimentation in the realm of meals that require bowls and spoons.

For days when I have a hankering for soup but need to go easy on the time expenditure, I came up with this spin on Vietnamese Pho. Maybe I shouldn't make that comparison at all, given this recipe's lack of beef tendon and bean sprouts, but the rice noodles and veggies call it to mind for me.

My version uses a miso broth (excellent for aid in digestion - hello, friendly flora!), greens, carrots, garlic and cayenne. It's simple, delicious and a breeze to make. Feel free to slurp.


Miso Rice Noodle Soup

1 serving (can easily be increased for friends)

thin rice noodles (about a handful)
2 T. miso paste (I use white miso)
1 garlic clove, minced
1 medium carrot, sliced
1 C. packed, chopped kale leaves
cayenne

Boil water in a small saucepan, and cook noodles according to package directions. Drain the noodles and rinse them with cold water. Place the noodles in the serving bowl and set aside.

Heat about 1 1/2 C. of water in the saucepan and add the miso paste. Bring to a boil, stirring to dissolve the miso, and then reduce heat to medium. Add the garlic and cayenne, and simmer for a couple of minutes. Then toss in the carrots and kale. Allow the veggies to cook for 1-2 minutes, stirring a few times.

Pour the broth and veggies over the noodles and serve steaming hot.

The variations for this soup are pretty endless. Add any vegetables you like, fresh herbs, bean sprouts, tofu, etc., etc.

Sunday, December 13, 2009

Little Time


My relatively new life as a college student has taught me some things, many directly related to my studies, but many the byproduct of late nights and early mornings with classes, work and study time crammed in between. In other words, I'm busier than I've been in years, and this schedule has forced me to rewire my typically relaxed routines.

Take grocery shopping. I used to stop at the store on my way home from work on a daily basis. I'd decide what I wanted to have for dinner on the spot and then head for the kitchen to make it happen. I made one night meals knowing that I'd have the time to cook again on the morrow. That is no longer my reality. Shopping is now a weekly event that takes into account the menu that I have planned for the week, most of which includes several days of leftovers. How would the world continue its turning without leftovers? I would surely parish.

With the avoidance of my own demise in mind, I've come up with several one-pot meals that can be made on a less stressful evening to ensure that when I am overwhelmed with research papers and math exams, the fridge contains food that can be reheated and eaten in fifteen minutes time. Here is one of my favorites from that list of dishes.

Indian Rice with Garbanzos and Greens
4-6 servings
(vegan & gluten free:)

1 C. brown jasmine rice (or your favorite rice)
2 C. vegetable broth
1 C. diced onion
1/2 C. diced celery
2 T. garam masala (an Indian spice)
1 tsp. ground coriander
1 tsp. tumeric
2 cardomom pods
2 cloves garlic, miced
1/2 tsp. cayenne (less or more depending on your spice tolerance)
1 15 oz. can garbanzo beans, drained (or 1 1/2 C. cooked garbanzos)
1 15 oz. can diced tomatoes (or 1 1/2 C. diced fresh tomatoes)
approx. 2 C. coarsely chopped kale or collard greens
1 C. coconut milk
salt to taste

To prepare the rice, I use a rice cooker, adding the rice and broth and flipping the switch. Alternately, you can prepare the rice in a pot on the stove according to package directions.


While the rice is cooking, in large skillet with tall sides, heat oil over medium and add onion. Cook, stirring for a couple of minutes, and then throw in the celery. Cook a few minutes more.
Add the garam masala, coriander, turmeric, the contents of the cardamom pods (discard the shells), garlic and cayenne. Stir the veggies and spices, cooking for another couple of minutes.

Add the garbanzo beans and tomatoes to the skillet and stir. Bring mixture to a boil, reduce heat to medium-low and simmer for 10 minutes, stirring occasionally. Toss in the chopped greens, stir, and allow to simmer for 2 minutes more.

Pour the coconut milk into the skillet and mix well with the veggies and beans. By this time, the rice should be done and can be added to the the skillet. Stir well, taste and season with salt if necessary (this will depend on the salt content of the broth you used to prepare the rice). You're ready to eat tonight and for several evenings to come.


*******************************************************************

Wow, I must be busy. I forgot to add the tomatoes to the dish pictured above. All this knowledge I'm gaining is apparently making me lose my mind.

Tuesday, November 3, 2009

Something New

Although Foodbuzz, Bon Apetit and Recipezaar have served me well, last weekend I decided that it was time to break free from the confines of other people's recipes and concoct something entirely of my own. My labors began at the farmer's market where it didn't take me long to settle on three main ingredients: greens, mushrooms, and shallots. This time of year the kale and collards come back into focus as the more delicate greens of summer are forgotten for awhile. Not only that, but the chantrelles are in full effect. Lots of vendors have heaps of the spongy, orange mushrooms as proof of their foraging efforts. They remind me of little umbrellas that shelter tiny spaces on the forest floor.

Back at home, I noticed some beans that I'd picked from my garden and put away to forget about. They were some kind of pole beans. "Jack and the Beanstalk," the seed packet had read, conjuring images of giants in the sky guarding precious golden eggs. Perhaps my seeds were planted a bit too late in the season to reach those heights, but still, those plants stretched and coiled upward into a massive web of leaf and vine, threatening takeover of the unsuspecting fennel growing just on the opposite side of their trellis. Their rediscovery in my fridge lent another dimension to the dish that was taking shape in my mind.

What I came up with was this simple, tasty meal:
(measurements aren't exact on this one)

Autumn Greens with Chantrelles, Shallots and White Beans
serves 2-4

1 medium bunch purple kale, roughly chopped
1 medium bunch collard greens, roughly chopped
1 large shallot, sliced into rings
1/2 lb. (or so) chantrelle mushrooms, sliced
1 C. cooked white beans
salt
2 (or more) dashes cayenne

Heat your wok over medium and toss in the mushrooms, arranging them in one layer. Allow them to cook for a few minutes until they begin to release their juices. Toss them in the pan and continue to cook for a few more minutes, stirring to prevent them from burning.

Add the sliced shallots, and cook, stirring for several minutes more, until the shallots begin to brown. Season with salt and a dash or two of cayenne.

Add the cooked beans to the wok, and toss with the mushrooms and shallots. Adjust the heat at this point if it seems that the mushrooms and/or shallots are getting too brown.

Toss the heap of greens on top and allow to cook down for a couple of minutes. Stir and flip all of the ingredients to wilt all of the greens. Season again with salt and add another dash or two of cayenne depending on your palate.

Cook a few minutes more, until the greens are done to your liking. Serve immediately. Smile.
***********************************************************************************
The thing I loved most about this simple dish was that the flavors of each ingredient were intact and shone through beautifully. It was delicious on its own, although I think I may serve it over quinoa the next time around for a complex-carb kick.

Monday, November 2, 2009

Acorn Squash Soup


Winter is peeking out from behind the flimsy veil of fall. The leaf litter on Seattle's sidewalks has already turned from the golden and flame-color of autumn nostalgia to the brownish rot of rain-soaked foot falls. My sweaters and scarves are no longer in waiting, and I hear the hum of the heater behind me as I type.

With this change of seasons comes the craving for warm foods. Steamy things that make my oven glow and my insides toasty. No better way to break through the chill and make things cozy than to fill up a bowl and my belly with delicious, homemade soup.

I acquired an acorn squash a couple of weeks ago. It sat lonely on my counter, its green shell tempting me with promises of the sweet orange flesh inside. I needed some inspiration and motivation to create something tasty with that lonely squash. What I needed was a lunch guest. The lovely Iris graced my company for a Sunday afternoon feast.

This is how you can make your own friends happy with delicious soup.

Acorn Squash Soup with Toasted Walnuts
serves 2-3

1 large acorn squash, cut into quarters
1/4 C. raw walnut halves
2 medium carrots, diced
1/2 C. onion, chopped
1 T. olive oil
1 1/2 C. vegetable broth
1/4 tsp. nutmeg
1/4 tsp. cinnamon
1/4 tsp. ground ginger
1/8 tsp. cayenne pepper
salt

Preheat the oven to 400 F. Cut the squash into quarters and place cut side down on a lightly oiled cookie sheet. Roast in the oven for 35 - 45 minutes, until soft.


Meanwhile, toast the walnuts in a dry skillet over medium heat, stirring, about 10 minutes or until golden brown. Be careful not to burn them! Transfer them to a small bowl, and set aside.

While the squash is still roasting, saute the onion and carrot in olive oil over medium heat for 10 - 15 minutes, or until the carrots are soft.


When the squash is done, remove it from the oven, and allow to cool slightly. Scrape the flesh into the bowl of your food processor, and discard the skins. Add the onions and carrots, nutmeg, cinnamon, ginger, cayenne and 1/4 tsp. salt to the food processor. Puree until the mixture is smooth, scraping down the sides of the bowl a couple of times.

Heat 1 C. of veg broth in a pot over medium-low heat, and transfer the squash mixture to the pot. Stir well and allow to heat for 8-10 minutes.

Taste the soup at this point and season it again with salt and/or any of the other spices used (I ended up adding another dash of both nutmeg and ginger). If the soup seems too thick, add more broth until the desired consistency is reached. Stir well and heat for several minutes more.

Divide into bowls and serve hot garnished with toasted walnuts.


I hope this brings a little warmth to your table. Enjoy.

Sunday, August 16, 2009

Blended Fruit


A.k.a. smoothies. Simple to make, hard not to enjoy. I realized this morning that my blender has been severely underworked this summer. With such an incredible diversity of fruit ripening before my eyes, I feel as though every breakfast should be pureed and slurped before the first frosts steal it all away. There are several things that I love about smoothies:
  1. It's difficult to come up with a bad combination of flavors.
  2. Experimentation pretty much always leads to success.
  3. Pretty colors.
  4. They are quick, and they are easy.

Today, when I opened the fridge, I was greeted by a half pint of blueberries received in my CSA share yesterday and a peach that was given to me by another farmer earlier this week (fruit gifts are the greatest). Together they were destined to become a sweet liquid to satisfy my morning hunger.


I like to keep it simple, folks. No powders, no syrups. Just fruit and juice or rice milk. Simply delightful. Happy summer.

Sunday, July 26, 2009

Spicy 'Slaw


I recently attended a potluck barbeque for a good friend's birthday celebration. She was hosting the soiree at her own cute cottage house and wanted everyone to bring a dish so that she wouldn't have to spend the entire day in the kitchen. No blame there.

Potlucks can be my favorite types of parties to attend (depending on the guest list and their ideas about what food is). There was zero hesitation on my part when deciding on the fare I would provide. For some unknown reason, I had been craving coleslaw for weeks. As soon as spring arrived, there seemed to be recipes abounding for this crunchy cabbage salad. Every photo I saw in a food mag or recipe website turned on the sprinkler in my mouth and made my stomach grumble. By the charms of serendipity, I happened to have received a head of cabbage in my CSA share that very same week. It waited patiently in my crisper to be sliced, dressed and tossed into pure satisfaction.

The recipe I used for the party included not only cabbage but also a yellow summer squash grated into the mix. One of the pleasing things about coleslaw, besides the effortlessness of its preparation, is the opportunity for veggie diversification. It's easy to experiment with it. Below is the recipe that I used to create the 'slaw pictured above.

Spicy 'Slaw (Vegan!)
8-10 servings

1 medium head cabbage, thinly sliced
half of 1 large red bell pepper, thinly sliced
2 medium carrots, grated
4 T. vegan mayo (or regular mayo)
2 T. Dijon mustard
1 T. fresh lime juice
2 tsp. agave nectar (or 1 T. sugar)
1/2 tsp. salt
1/4 tsp. cayenne pepper

Toss the cabbage and other veggies together in a large mixing bowl. In a small bowl, whisk the mayo, mustard, lime juice, agave, salt and cayenne until combined. I taste the dressing at this point and see if I want it saltier or spicier, and I usually end up adding a little more cayenne (I like the heat!). Pour the dressing over the veggies and toss until they are completely coated. Cover and place in the refrigerator for at least 30 minutes, but preferably 1 hour (or overnight). Serve and enjoy!

This recipe can easily be doubled, tripled, etc. for your big bashes this summer.

Tuesday, July 14, 2009

Cherries - Episode I: Amazing Muffins


One of the most exciting things about the onset of summer, as far as I'm concerned, is the return the beloved cherries. Their little round, red bodies heaped in bins at the farmers markets and roadside stands make me tingle with elation and the anticipation of savoring the sweetness or tartness that awaits every bite.

Most of the time, I purchase Washington-grown cherries by the pound and pop them straight into my mouth. They never stick around long enough be used in a recipe. Besides, they really need no enhancement; practically perfection as is. This year, however, I decided that while many of the cherries brought home would be snacked on immediately, at least a few of my fruitful goodies would be incorporated into delicious treats. And what could top the tasty scale more than cherry chocolate chip muffins? I couldn't think of anything either.


I highly recommend recreating these in your own kitchen. The recipe below will get you there.

Wheat-free Cherry Chocolate Chip Muffins
Adapted from the "Fresh Cherry Muffins" recipe found in The Farm to Table Cookbook by Ivy Manning.
(yields 12 muffins)
  • 6 T. butter or vegan margarine, at room temperature
  • 1/2 - 3/4 C. agave nectar (depending on the voraciousness of your sweet tooth)
  • 1/2 tsp. salt
  • 1 egg or the equivalent of egg replacer (such as Ener-G)
  • 1 1/2 tsp. vanilla extract
  • 2 1/2 C. spelt flour (I can't do wheat, but you're welcome to:)
  • 2 heaping tsp. baking powder (level them off if you go the wheat route)
  • 1/4 tsp. baking soda, heaping
  • 1 C. milk or non-dairy substitute (I prefer rice)
  • 1 1/2 C. pitted, fresh cherries, coarsely chopped (I used Bing & Ranier)
  • 1/4 C. chocolate chips (semi-sweet, dark... whatever floats your cocoa boat)
  • 1/4 C. sliced, raw almonds
Preheat oven to 375 F. Lightly grease your muffin pan, or line with paper muffin cups. Beat the margarine, agave nectar and salt in a mixing bowl until well blended, scraping down the sides to incorporate well. Add the egg replacer and vanilla extract, and beat to combine.

In a separate bowl, stir the flour, baking powder and baking soda together until well mixed. Add the dry ingredients to the wet in two additions, alternating with the milk. Use a wooden spoon to mix the ingredients just until they are incorporated. Overmixing makes for lousy muffins; resist the temptation.

Fold in the cherries and chocolate chips (once again, do not overmix). Spoon the batter into the prepared muffin cups, and sprinkle the sliced almonds over their tops. Bake until the muffins are golden brown and they pass the toothpick test. It'll take about 20-25 minutes.

After removing from the oven, allow your muffins to cool in the pan for at least 15 minutes (I couldn't resist sampling one after about 5 minutes - beware the insanely hot fruit!). Remove them from the pan and serve them right away. If you want to hang on to some for a few days, keep them in the fridge, and then heat them up before scarfing. They can also be frozen for up to a couple of weeks.


I know from experience that you will become more popular than ever once these puppies hit the taste buds of your friends and families. Light and slightly sweet with a punch of cherry chocolate goodness, you'll enjoy tea time and cherry season that much more.

Stay tuned for more spherical succulence when we return with Cherries - Episode II: Heavenly Crisp. Bringing divinity to my kitchen and yours.
Related Posts with Thumbnails